Learning Outcomes
Students explain condensation as a change of state from gas to liquid, identify when it happens, and recognise examples in daily life.
A complete Primary 5 science lesson on how water vapour changes into water droplets when it loses heat on a cooler surface. Students predict, observe, explain with CLC, apply the idea to daily life, and reflect on what they still wonder.
Built from the 18-page Community Gallery PDF and strengthened into a web lesson with clear student tasks, teacher moves, and an embedded simulation.
Students explain condensation as a change of state from gas to liquid, identify when it happens, and recognise examples in daily life.
I can state the source of water vapour, name the cooler surface, say that heat is lost, and explain where droplets form.
45 to 60 minutes: 8 min engage, 12 min experiment, 12 min simulation, 12 min CLC practice, 6 min quiz and exit pass.
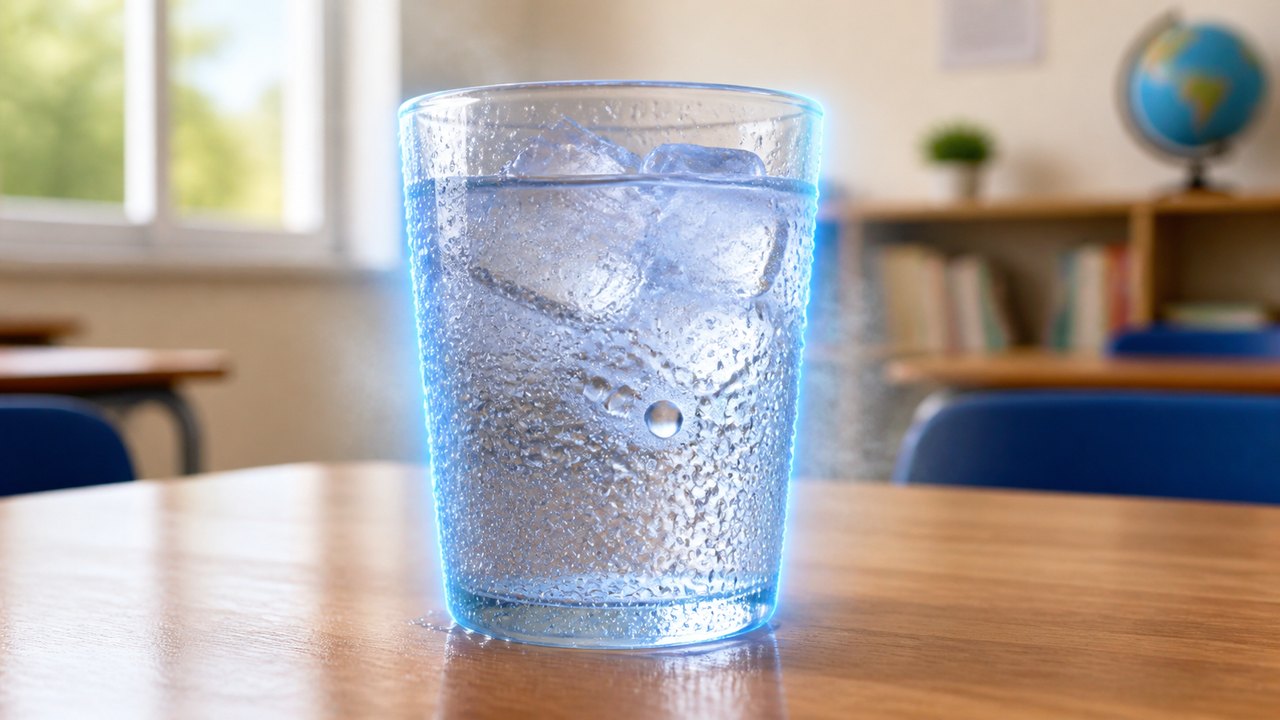
When water droplets appear on the outside of a cold glass, where did those droplets mainly come from?
Use this before the simulation so students have a real observation to connect with the digital model.
Ask: Which cup will have the most water droplets? Where will the droplets appear: outside, inside, under the cover, or nowhere?
Compare cold water, room-temperature water, and hot water. Students record both the amount and location of droplets.
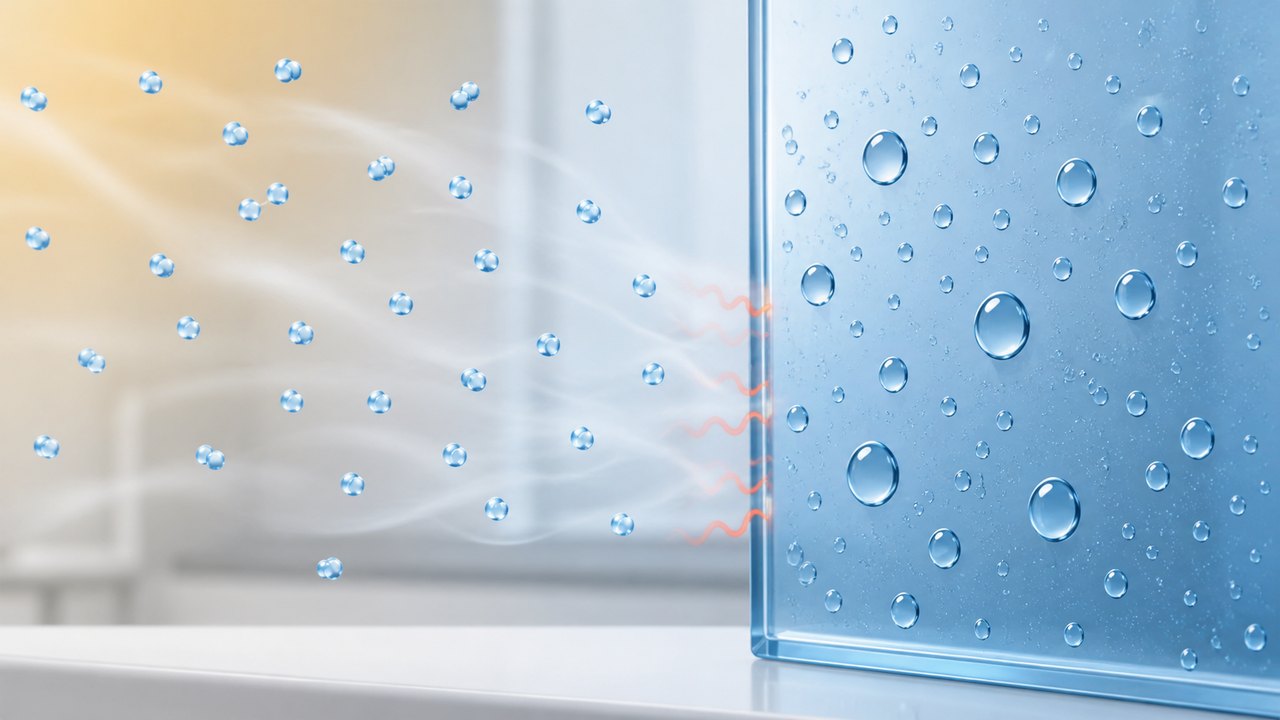
Prompt students to link each observation to temperature difference, cooler surface, water vapour, heat loss, and droplet formation.
| Set-up | Prediction | Observation | Science Reason |
|---|---|---|---|
| Cold water in cup | Where will droplets form? | Look for droplets on the outside surface. | Water vapour in surrounding air touches the cooler outer cup, loses heat, and condenses. |
| Room-temperature water | Will droplets form? | Usually no clear droplets. | There is little or no temperature difference, so condensation is not observed. |
| Hot water with cover | Where will droplets form? | Look inside the cup and under the cover. | Water vapour from hot water touches a cooler inner surface or cover, loses heat, and condenses. |
Use the simulation from the folder to repeat the investigation and make the temperature difference visible.
Try 5°C, 30°C, and 70°C. Compare the water droplet locations and the results table.
Write a prediction: Which temperature will produce droplets, and where will they appear?
Say what you see before reading the explanation. Look carefully at the outer glass, inner glass, and cover.
Use the results table to connect temperature difference with droplet formation.
Both cases show condensation, but the source of water vapour and the droplet location are different.
The PDF uses the CLC technique. This version makes it explicit and repeatable for primary school students.
Comes into contact: Water vapour from _____ comes into contact with the cooler surface of _____.
Loses heat: The water vapour loses heat to the cooler surface.
Condenses: It condenses into water droplets on _____.
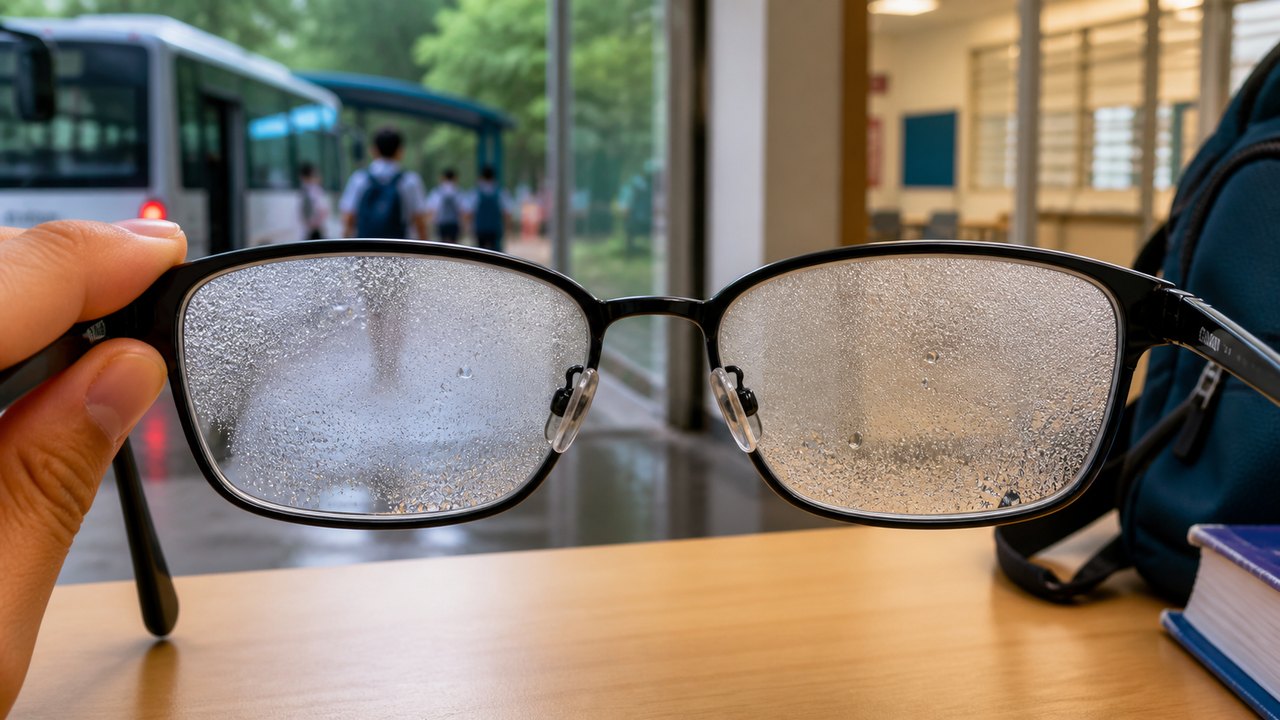
Water vapour from the surrounding air comes into contact with the cooler surface of the spectacles. The water vapour loses heat and condenses into water droplets on the spectacles, making them look foggy.
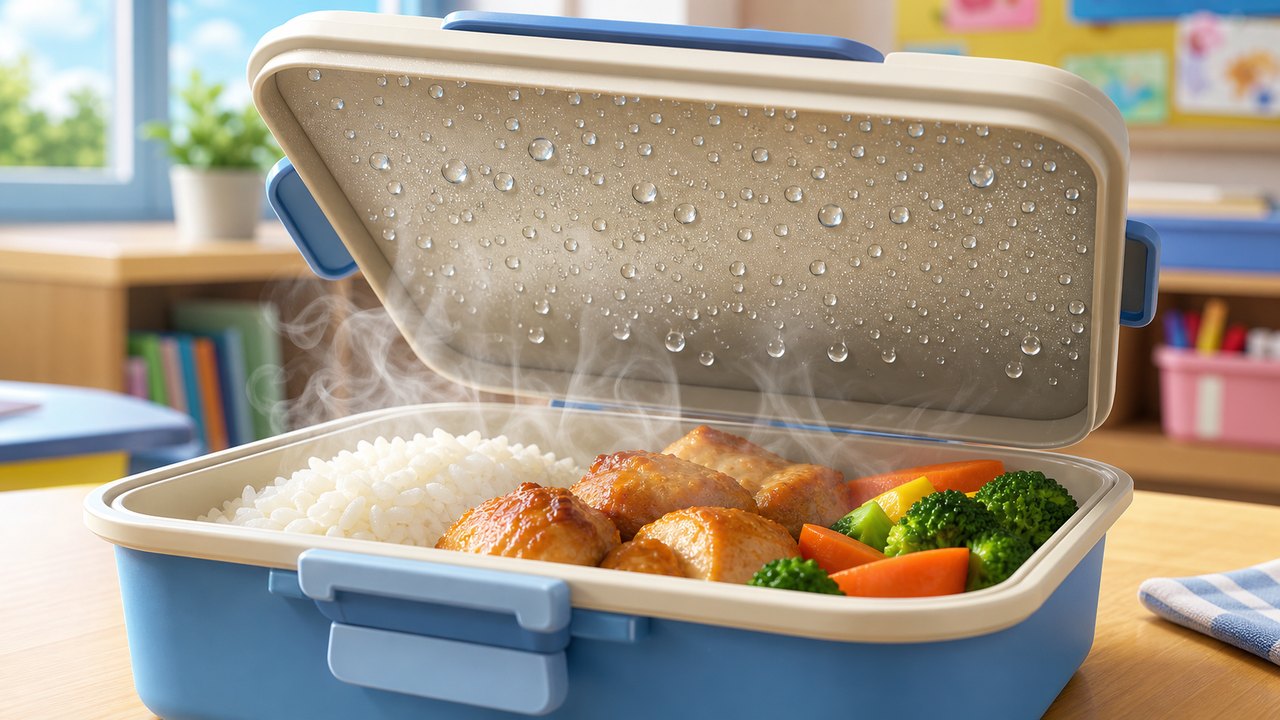
Mum packed a warm lunchbox for Siti. When Siti opened it, she saw water droplets on the underside of the cover.
Choose one example from home or school, then explain it using CLC.
Add a picture of condensation from home or school, then use it to write your CLC explanation.
Water vapour from the warm food comes into contact with the cooler underside of the lunchbox cover. The water vapour loses heat and condenses into water droplets on the underside of the cover.
A short 4-mark quiz based on the PDF, with instant feedback for independent practice.
The earlier improvement ideas have been embedded into the lesson at the point where they support student thinking.
Now placed after the cold-glass image so students confront the common idea that droplets leaked from inside the cup.
Now placed inside the daily-life extension so students can connect their own condensation example to a CLC explanation.
Now placed before the simulation so students see contact, heat loss, and droplet formation before testing the three temperatures.
Now placed after the simulation to help students compare the same condensation process across different sources and surfaces.
Source basis: P5 PLT - Condensation_Final - Submission to Community Library.pdf, including the learning outcome, simulation activity, CLC explanation frame, daily-life examples, quiz, and exit pass.