Note that I did most of the uploading and extracting of source files through command line, but if you have SFTP access or can access through your cPanel’s file manager, you can also just download the source files and use the user interface to upload them to your server. I will include a script that runs all these from the command line.
My server is running Ubuntu 20.04 64-bit (Focal Fossa). Some of the commands here may be slightly different if your server is running on a different OS.
How to Login to SSH with Key Pair
Your web host should have instructions on how to set up a key pair. You have to enter the public key in the server configuration (usually on your cPanel or dashboard) and have your private key ready in your computer. Don’t share the private key to anyone or upload it to the server. If this is the first time setting up your server, you may see that the server refused the private key:

This is because the public key must be added to a file called authorized_keys in the .sshdirectory. You probably have to create the directory and the file.
Log in with your server password. The password is intentionally hidden so you won’t see anything appearing when you type.
Then execute these commands to create the directory and the file:
mkdir .ssh
nano authorized_keys
If your server does not have nano text editor you can either install it or use whichever editor they already have installed.
Right click to paste the public key into the text editor. It should look something like this:
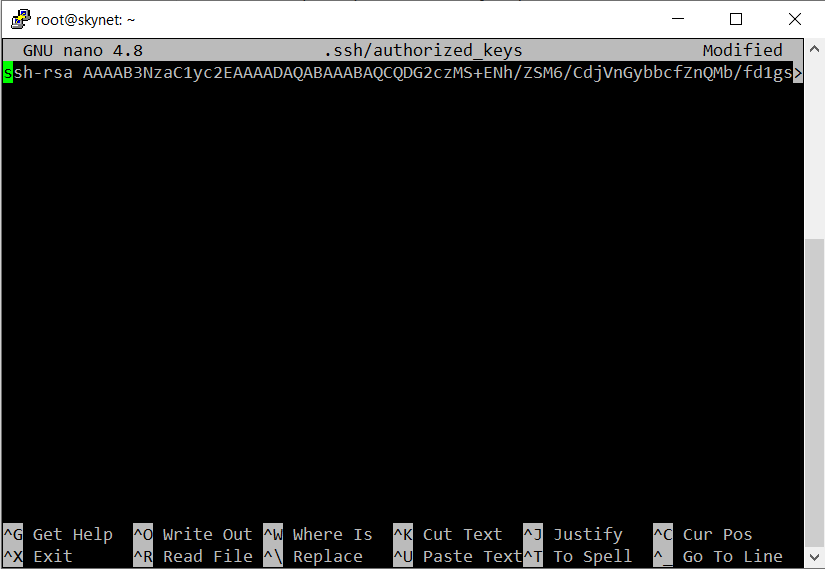
If you are on nano do Ctrl+X to exit, type y to confirm, hit enter to save file and you’re back to the command input.
To verify it is working type exitand restart the ssh connection.

You have to use the private key file saved in your computer to connect (steps vary based on your ssh client)
If you have done it right it should recognise the private key and prompt you for the passphrase (if you entered one).

Installing Nodejs with GCC Method 1 (Linux package manager)
If your server is running Linux you can probably use the package manager to install node and npm with a few commands (simplest method). Following nodejs instructions (https://nodejs.org/en/download/package-manager/):
curl -fsSL https://deb.nodesource.com/setup_16.x \| sudo -E bash -
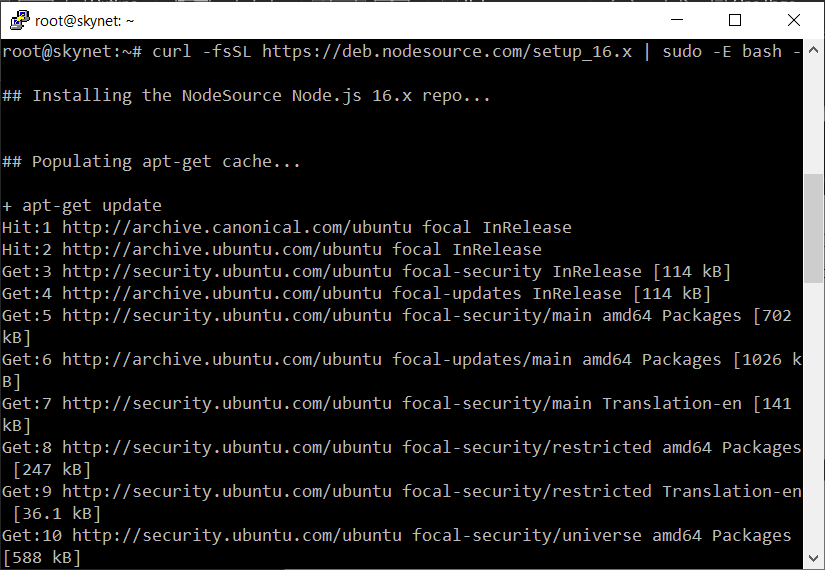
The server may prompt you to run sudo apt-get install -y nodejs and sudo apt-get
install gcc g++ make

Verify that npm, node and gccare installed with npm -v, node -vand gcc -v. They should output the respective version numbers.

Installing Nodejs Method 2 (via nvm)
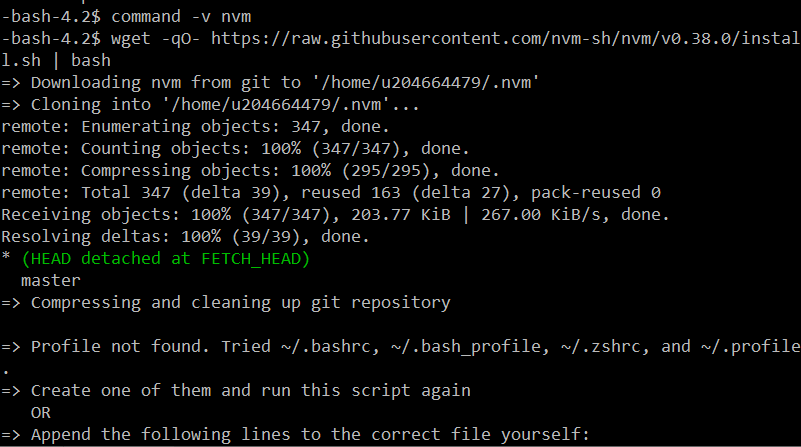
You can also install nodejs via node version manager (nvm) instead, perhaps if the above method didn’t work. I ran this on another server with more limited shell access.
wget -qO- https://raw.githubusercontent.com/nvm-sh/nvm/v0.38.0/install.sh
\| bash
or
curl -o- https://raw.githubusercontent.com/nvm-sh/nvm/v0.38.0/install.sh \|
bash
If you get the above warning just copy and paste the commands provided by the terminal and continue, for me it was
export NVM_DIR="\\(HOME/.nvm"
[ -s "\\)NVM_DIR/nvm.sh" ] && \\. "\\(NVM_DIR/nvm.sh" \# This loads nvm
You will have to do this every time you log in to ssh unless it’s added to the .bash_profile file in root (more on that later on).
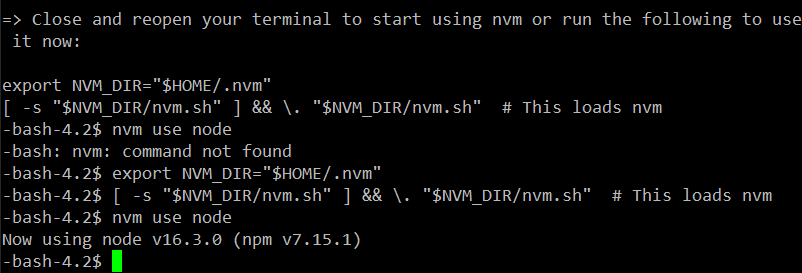
Verify that nvm is installed with the command nvm –version. The version number should show up if successfully installed.

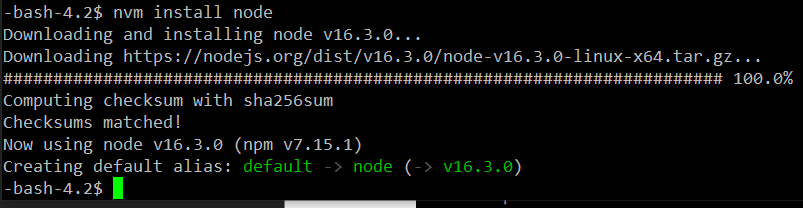
Then install node with nvm install node, wait a while for it to complete.

Once completed, type nvm use node

Test if node is running with command node

You can try console.logand it should output what you wrote

To exit node, use Ctrl+D
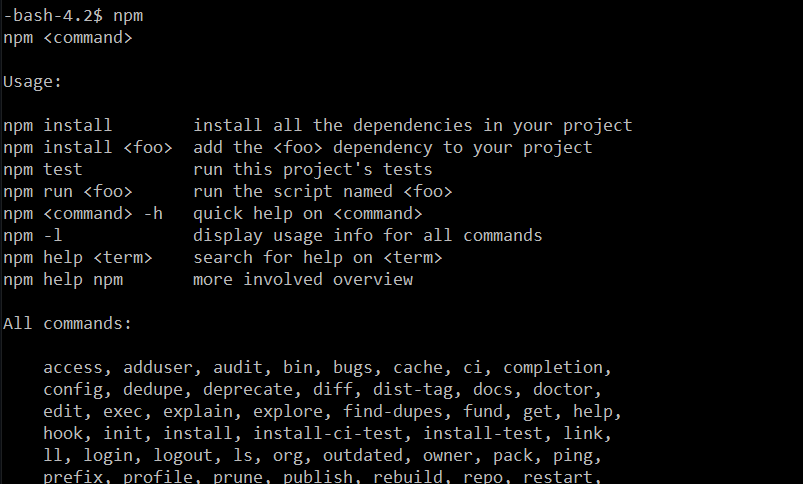
You can also test if npm is installed and working with command npm
Installing Nodejs Method 3 (manual install)
If the other methods fail you can try to manual install, but this requires more configuration options depending on your server.
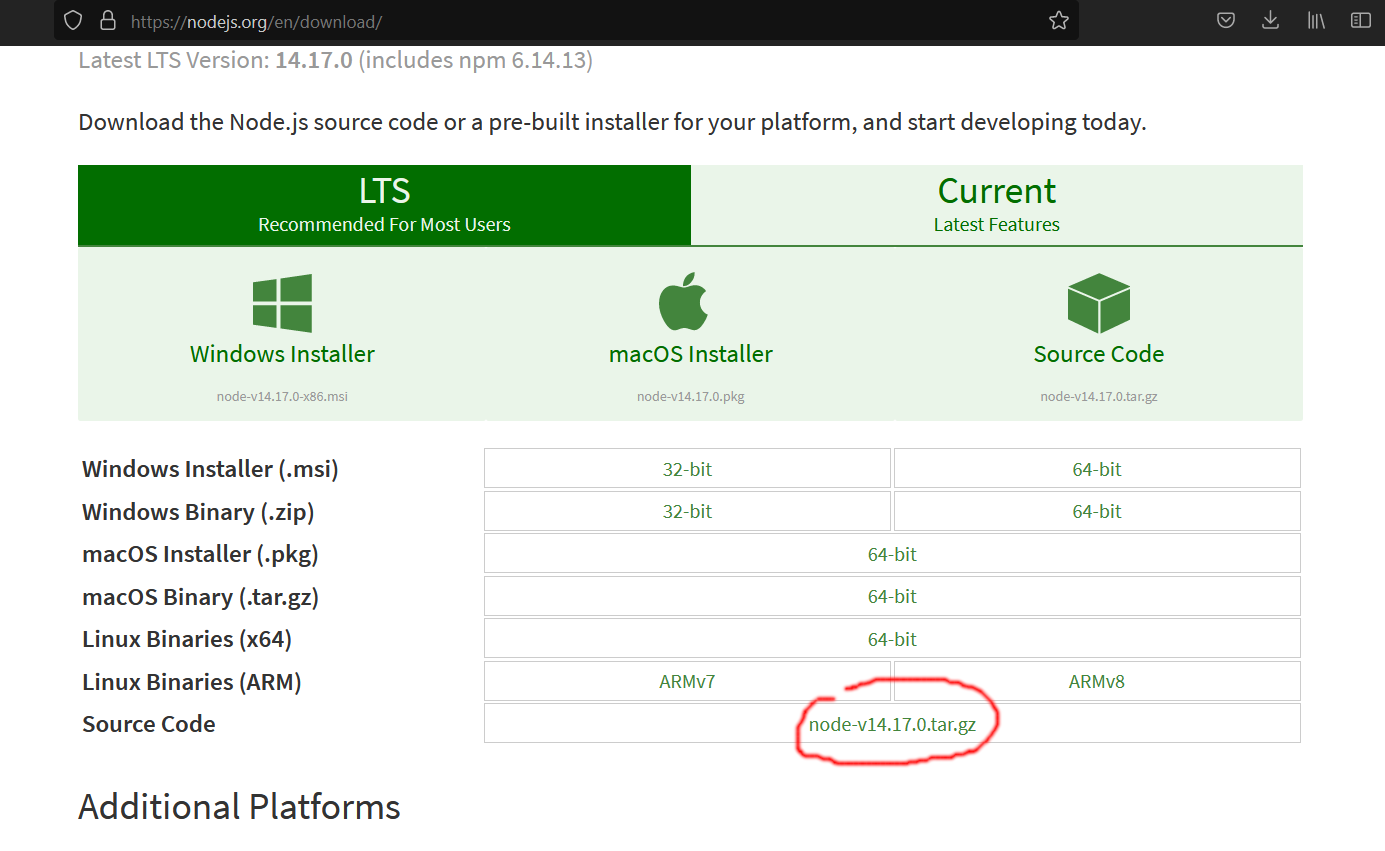
You can get the current download link from the nodejs website as shown in the screenshot below. No need to install it locally, just copy the link to the source files. Direct download link for current version as of this writing: https://nodejs.org/dist/v14.17.0/node-v14.17.0.tar.gz
Switch back to terminal. Type cd \~ to change directory to root
Type wget <your source file link> to download the source code to root. You can right click to paste.
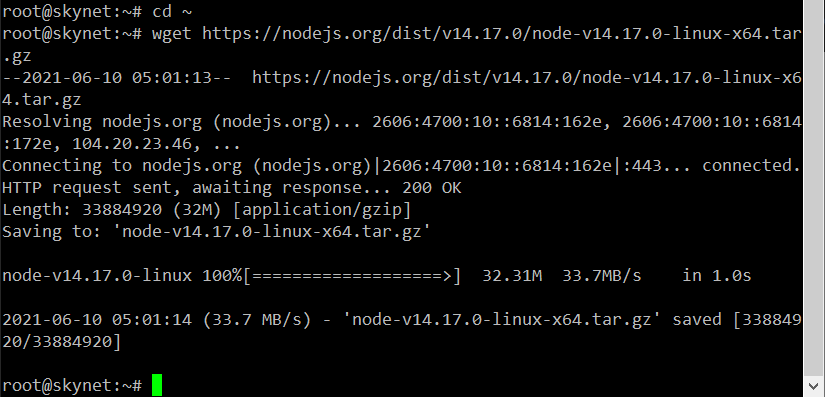
Type tar xvf <your file name> to unzip, this may take a while depending on your server.
You can rename the directory so it’s easier to remember, execute mv <directory
name> <new name>, in this screenshot I’ve renamed my directory from node-v14.17.0-linux-x64to nodejs

Next, install the node and npm binaries so you can run commands on the server
mkdir ~/bin
cp nodejs/bin/node ~/bin
cd ~/bin
ln -s ../nodejs/lib/node_modules/npm/bin/npm-cli.js npm
These commands mean create a new directory bin in root, copy nodejs binaries over to it, change directory to bin and lastly create a link to the npm binary so that you can execute commands with the shortcut npm.

There may be additional config required that I’m not very familiar with.
Installing GCC (skip if already installed)
If you used the Linux package manager for nodejs and already installed gcc you can skip this. Or your web server may already have a C compiler by default. If gcc -v or cc-vreturns some output with the gcc version number, then you already have it installed.
This is required by GraphicsMagick. You can use any C compiler (gcc, cc, etc) that can run on your web server. I went with gcc.
You can do this from the command line or user interface on file manager/any SFTP client. I ran into problems unzipping the file in command line on the limited server, so I did it in file manager instead.
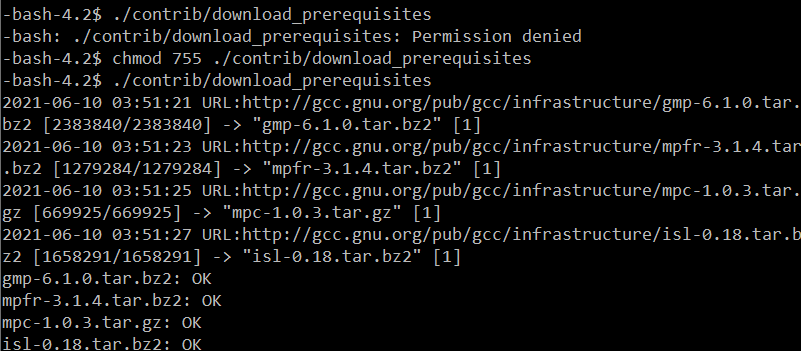
There are plenty of mirror sites you can download gcc from (list here: http://www.gnu.org/prep/ftp.html). I used this link (direct download): http://mirror.team-cymru.com/gnu/gcc/gcc-11.1.0/gcc-11.1.0.tar.gz
You do not actually need to download it to your local computer. Just type wget
<direct download url>in ssh to download it to your server, e.g.:
wget http://mirror.team-cymru.com/gnu/gcc/gcc-11.1.0/gcc-11.1.0.tar.gz
Command to unzip the file: tar xzf gcc-11.1.0.tar.gz or via your file manager UI

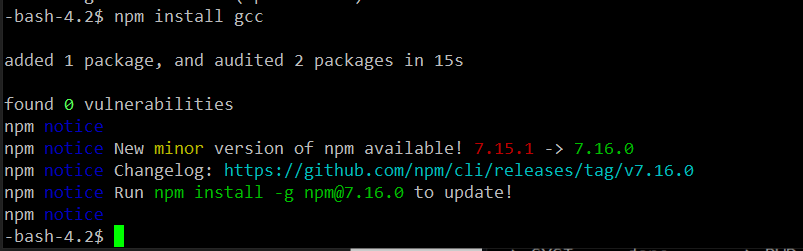
You can also install gcc with npm install gcc, but it’s not recommended since the gcc version served by that command is likely outdated and the compiler didn’t work for GraphicsMagick. In any case I’ve screenshotted the process here in case you want to try.
Installing GraphicsMagick
Type wget
ftp://ftp.graphicsmagick.org/pub/GraphicsMagick/1.3/GraphicsMagick-1.3.19.tar.gz

Unzip the archive with tar -xvf GraphicsMagick-1.3.19.tar.gz

Enter the GraphicsMagick directory: cd GraphicsMagick-1.3.19. Type ./configure.

If you get a missing C compiler error, find where your GCC is installed with whereis gcc, then enter export PATH=\)PATH:<your path to gcc>

Wait for the config to finish, then type the following commands:
make
make install
Verify GraphicsMagick was successfully installed with gm version.

Installing Spacedeck
Download the Spacedeck source from Github to your server:
wget https://github.com/spacedeck/spacedeck-open/archive/refs/heads/mnt.zip
Unzip the archive:
unzip mnt.zip
Change working directory and install dependencies:
cd spacedeck-open-mntnpm install

Open up the config file.
nano config/default.json
You should see a file like this in the editor.
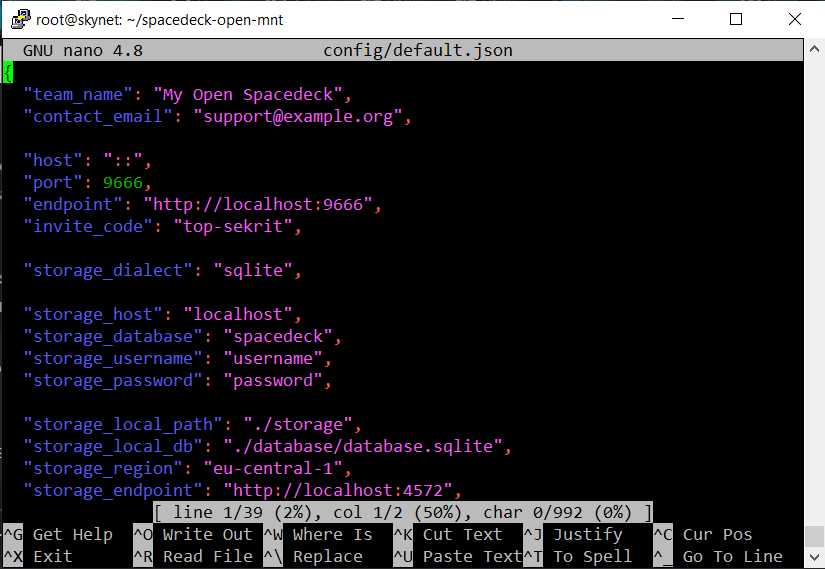
Scroll to the bottom and enter the default colours as the value for the key "spacedeck" (at the end of the file):
"spacedeck": { "default_text_color": "#E11F26", "default_stroke_color": "#9E0F13", "default_fill_color": "#64BCCA", "swatches": [ {"id":8, "hex":"#000000"}, {"id":30, "hex":"rgba(0,0,0,0)"}, {"id":31, "hex": "#E11F26"}, {"id":32, "hex": "#9E0F13"}, {"id":33, "hex": "#64BCCA"}, {"id":34, "hex": "#40808A"}, {"id":35, "hex": "#036492"}, {"id":36, "hex": "#005179"}, {"id":37, "hex": "#84427E"}, {"id":38, "hex": "#6C3468"}, {"id":39, "hex": "#F79B84"}, {"id":40, "hex": "#B57362"}, {"id":41, "hex": "#E7D45A"}, {"id":42, "hex": "#ACA044"} ]}
Save and exit.
Launching Spacedeck
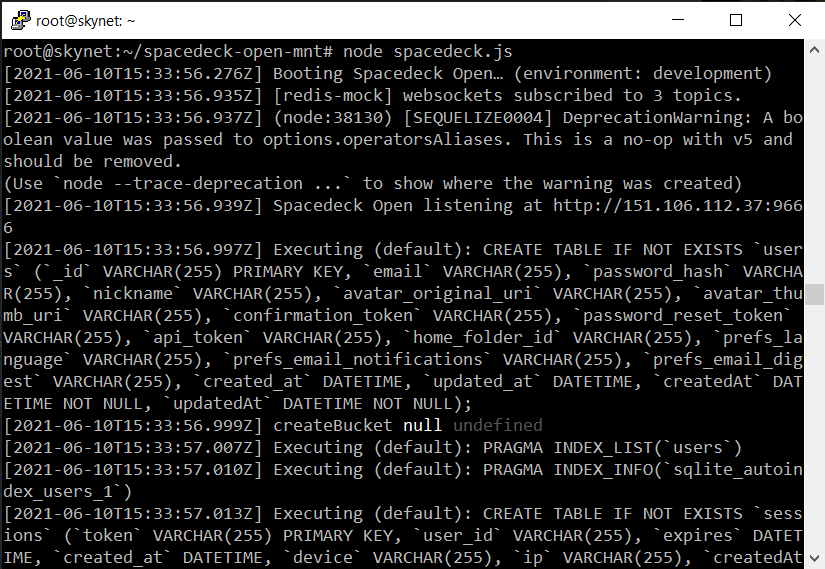
You should be ready to launch Spacedeck now.
node spacedeck.js
If all goes well you will see some output like the following:
Troubleshooting Spacedeck Errors
You may run into errors when starting Spacedeck and I can't provide a detailed guide on how to resolve them as it really depends on your specific environment.
If npm install complains about missing packages you can try to install the packages manually with npm install <package name>.
The issue I had was that sequelize couldn't open the database file.
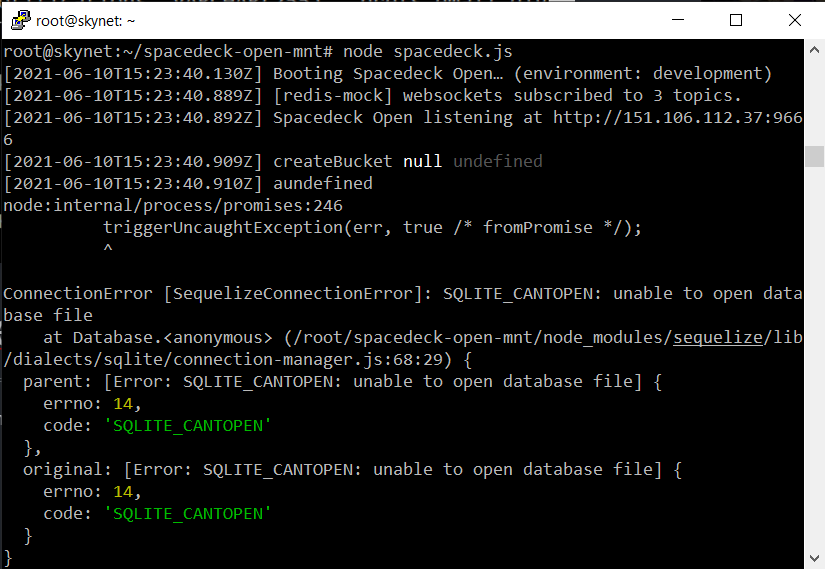
I resolved it by uninstalling and reinstalling sequelize:
npm uninstall sequelizenpm install sequelize
Editing .bash_profile (autoloaded whenever you log in to SSH)
.bash_profile is located in the root directory ~/ and is like a configuration file that runs whenever you log in to SSH. If you don’t add nodejs in .bash_profile, you will have to manually enter the command to start it every time.
To edit .bash_profile you can open it from your root file directory (you need to use sftp protocol to access the root folder, ftp account won’t work since it is usually only restricted to viewing public_html directory and lower). You can also go to your cPanel and enter File Manager from there. You can find .bash_profile in the root directory.
Alternatively, you can use the built-in text editor in the command line (may vary by web server architecture). Mine is nano:
nano .bash_profile

The file may be empty. Just add in the text that the output told you to (if any). I also added GCC to my path in the .bash_profile (necessary for GraphicsMagick to detect the compiler).
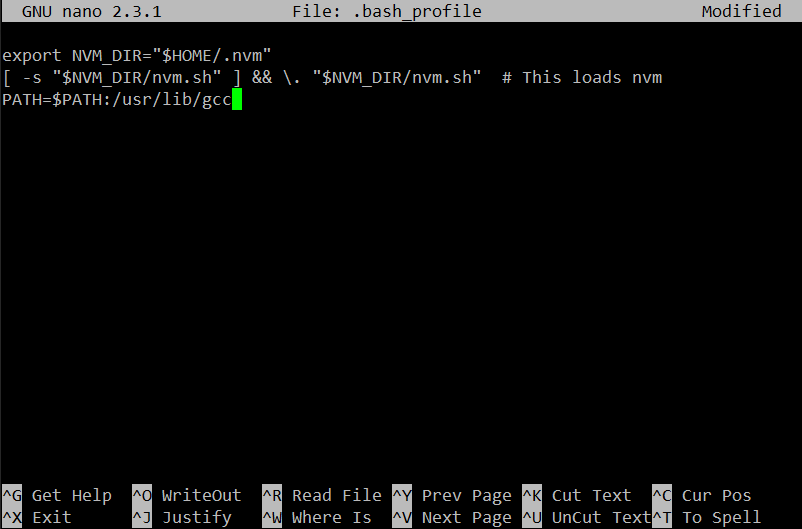
Save and exit after modifying the file. You may need to restart the SSH session for changes to take effect.
Verify that the changes are added to \(PATH with echo \)PATH. You should see your path to gcc at the end of the output.

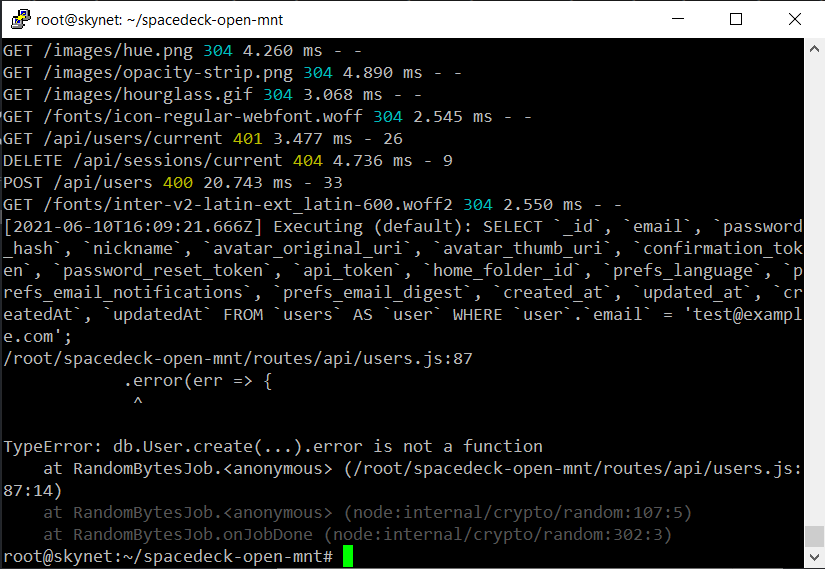
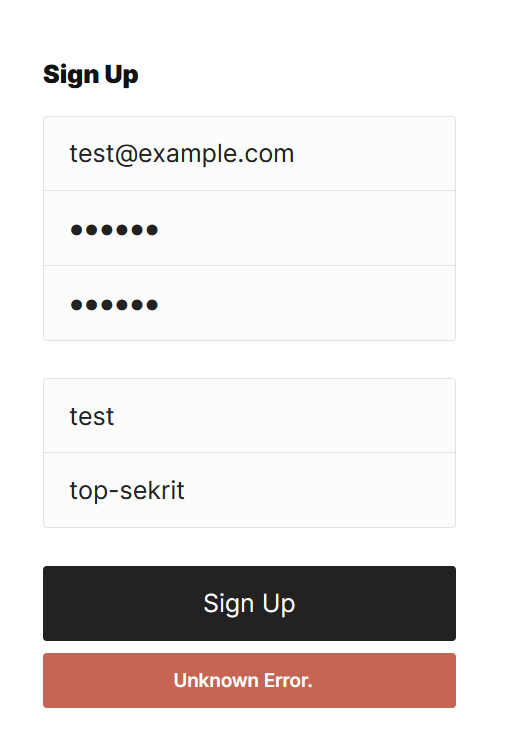
Current Errors
The current installation doesn't work because of a backend problem (unknown error). It has yet to be resolved.
Frontend error:
Console output: